Why physical keys should be considered as secrets as passwords?
Anatomy of a cylinder and a key
The first step is to understand how a key work and how it's linked to a cylinder.
First, the cylinder is a piece of metal which is mounted on a door. That cylinder allows interacting with the door mechanism to lock or unlock the door. From an external point of view, the only thing visible is the keyway profile like the following screen. That part could be considered as a public key as anyone can see it, but it does not allow opening the door with only that.
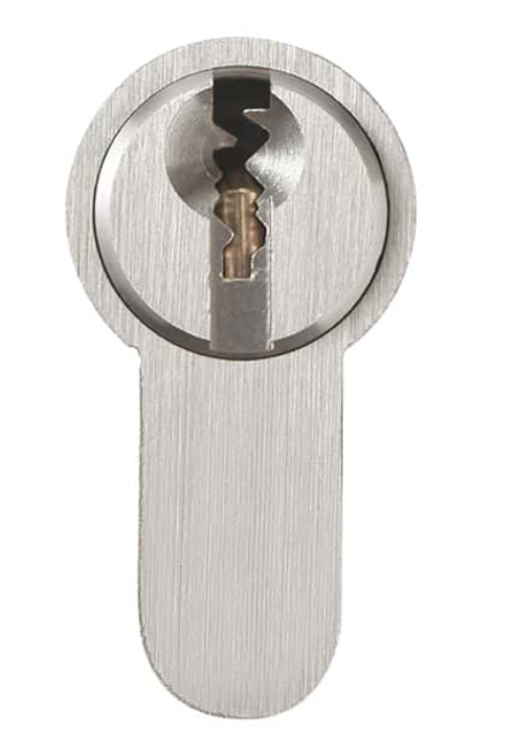
Figure 1: Cylinder keyway
The second part is the key. The key should have the same keyway to enter the cylinder, but it also needs to have the correct combinaison of teeth to match the cylinder. To simplify, we will assume that each cylinder possesses a different denture. So, only one key can fit on the cylinder present on a certain door.
The tooths of the key should be considered as a password for a cylinder, if all the tooths are correct, the key can rotate the cylinder and then open the door, if not, you stay outside the door.
That behavior is based on a mechanism on internal pin present on the cylinder, when all the tooths have the right length, the pins are in a certain position that allows rotating the cylinder like shown on the first image. On the second image, the PIN 1 and 2 are not set correctly avoiding the cylinder to turn.
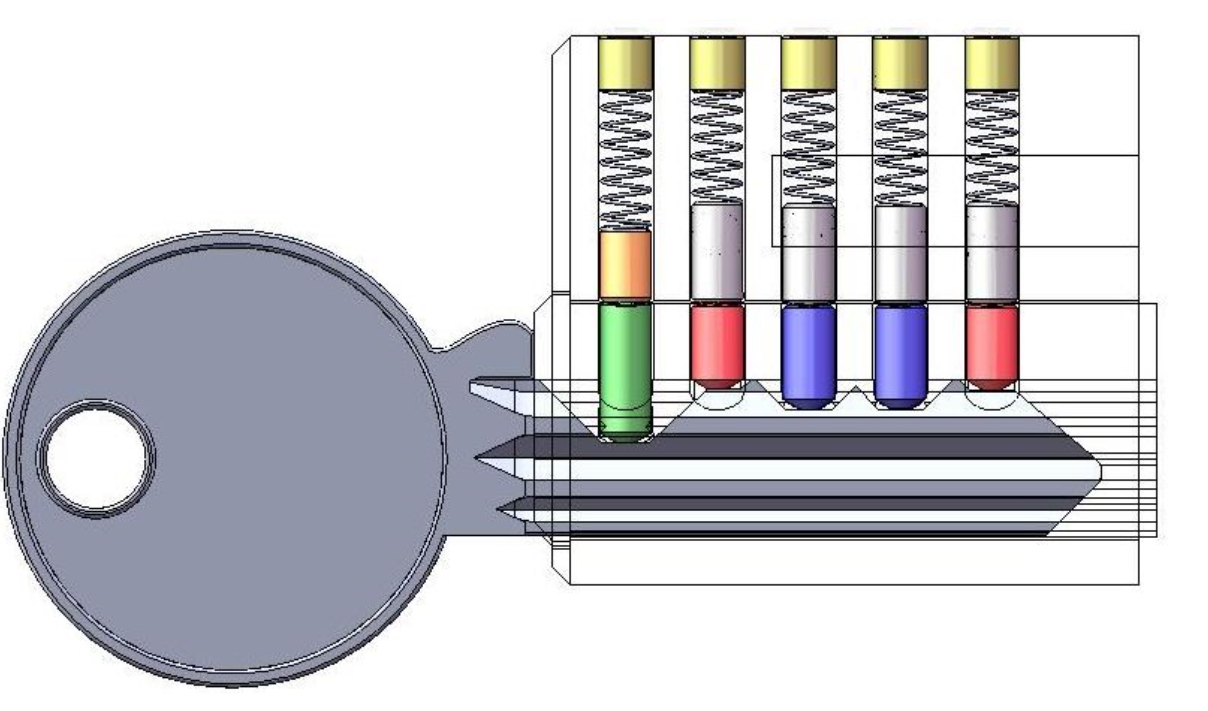
Figure 2: All pin well set
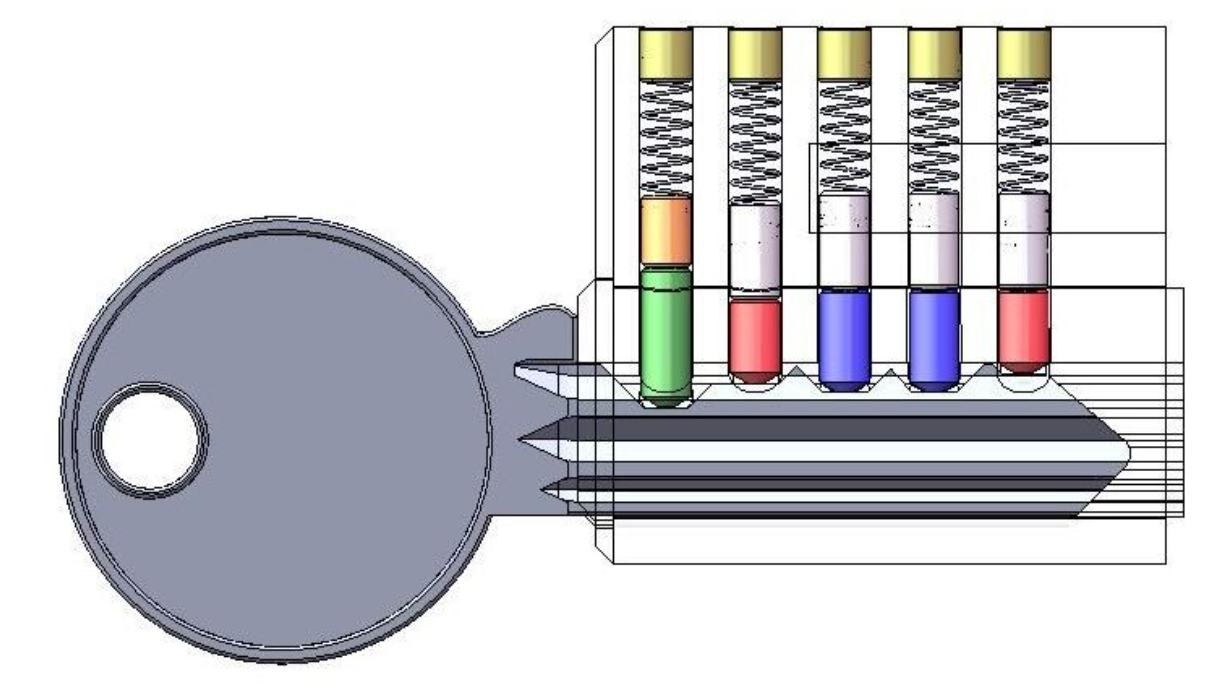
Figure 3: Pin 1 and 2 not set correctly
Src: https://mechanical-engineering.com/lock-design-part-1/
No more theory, go to practice
So, to create a key, we need two things:
- The key profile
- The key denture
The first one, like written before, a picture could be taken directly from the door and kept aside for the next steps.
Regarding second one, a photo of the original key should be taken but a reference should also be taken on the picture. It's here that the KeyDecoder Android application developed by Maxime BEASSE and Quentin Clement with the help of FrenchKey help us to get the height of each PIN.
That application allows taking a picture of the key on an ISO/CEI 7810 ID-1 sized card (like credit card for example).
That card allows getting a reference for the two axes of the image and getting a precise position of each pin.
As an image is better than all words, this is a video of the key analysis.
It should be noticed the process could be performed later. The prerequisites are only the profile picture, the picture of the key and the card.
What the hell are all these numbers
At the end of the applications steps, lots of numbers were displayed on the keys.
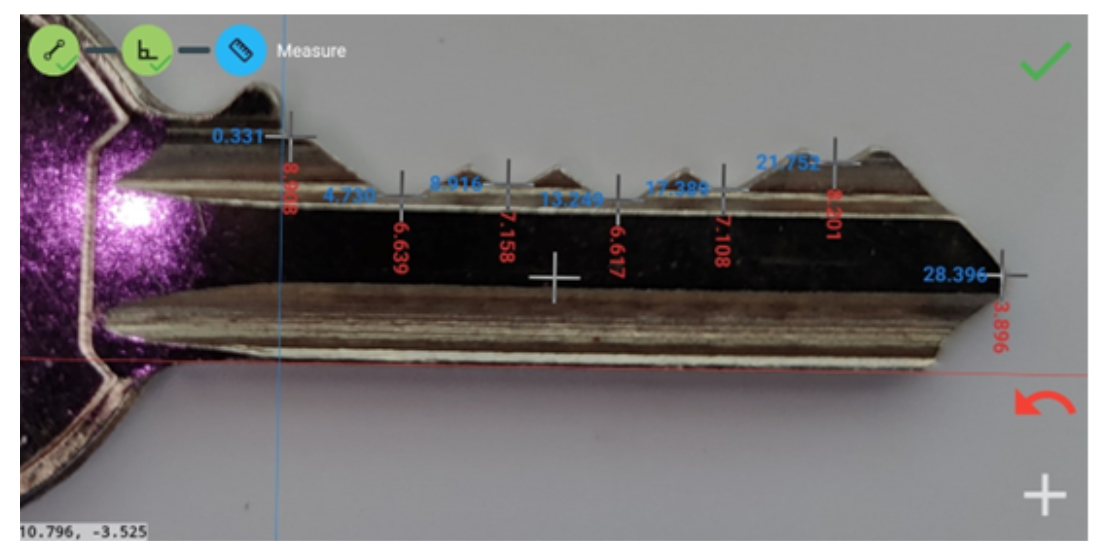
Figure 4: PIN heights on KeyDecoder application
These numbers are the size and the position or each tooth of the key that we should reproduce.
It's from that point that a second application came to us: autokey3d.
That tool is quite old but still functional. The only missing point was that we needed to be a kind of key expert to use it as it relies on different brands and existing key set.
However, without being a locksmith, it could be complicated to know if the key is an ABUS C83 or TS5000. Or even a ZISK6 one. Even for writing that blog post, I'm not aware about what is what.
So, I decided to create a profile for that tool based on the result of the Keydecoder application. Instead of using the manufactured pin length, which is quite a mess due to the number of different vendors, profiles, etc. I decided to create a profile where the user says, "I want a tooth in 4.8mm from the beginning with a height of 5.43mm". These two numbers could be compared to a coordinate. These are all the numbers present on the end picture from the Android application.
Therefore, for the key present above, the following coordinate could be considered.
Pin number | Position from key stop (X axis) | Position from the bottom of the key (Y axis) |
1 | 4,73 | 6,64 |
2 | 8,92 | 7,16 |
3 | 13,25 | 6,62 |
4 | 17,39 | 7,11 |
5 | 21,75 | 8,20 |
An interesting point could be found for the positions X axis. All the pinc possesses the same space between each of them. In that case we can compute the mean of that space to ~4,25 mm ((21,75-4,73)/4) except for the first one which is 4,73 mm from the beginning of the key.
Let's go 3D
Now that we possess all the key mensuration, it could be possible to generate a 3D model thanks to the developed profile on the autokey3d software.
Some steps should be done:
- Creating the key profile based on the cylinder picture
- Updating the "metric" files present on the application
- Generating the key with all the pin length collected before
Creating the key profile
For that, the autokey3d tool possesses a feature that allows creating a vectorial image of the cylinder profile from a picture of it. An automated method could be used, but I prefer the manual one which could be more reliable depending on the profile curves.
Some profiles are already available on the application, but like said before, we are not a locksmith, and it could be complex to find the right one.
Below is a video of creating the key profile. The explanation of that is out of the scope of that blog post as it could take a long time to explain it. Do not hesitate to contact us for more details 😉
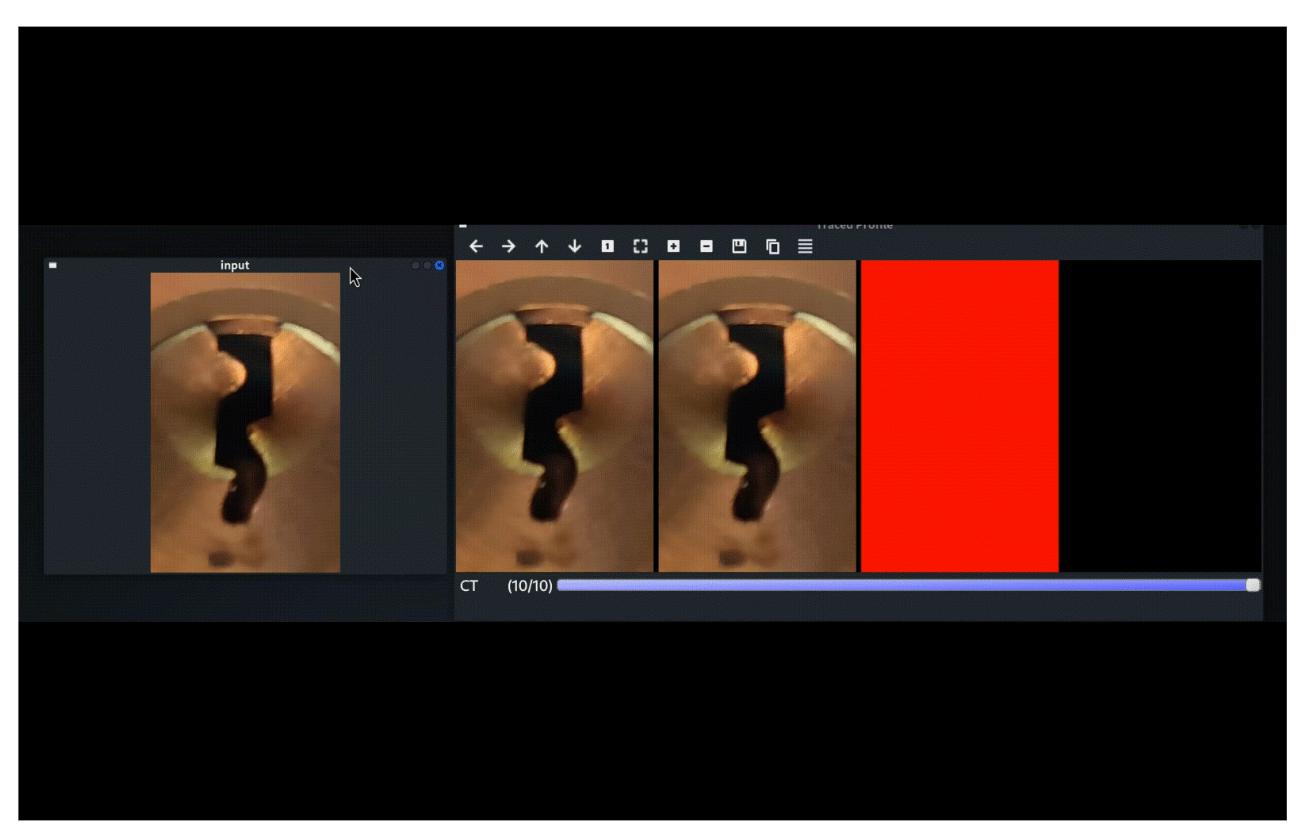
Figure 5: Creating the keyway profile on AutoKey3D
Updating the metric profile
A set of configuration file was added to the project and some of them should be updated.
Two important points are the key length that could be found using a dot at the end of the key from the Android application and the other one is the key height which could also be found on the Android application by adding a point at the right location.
The following image highlight these points.
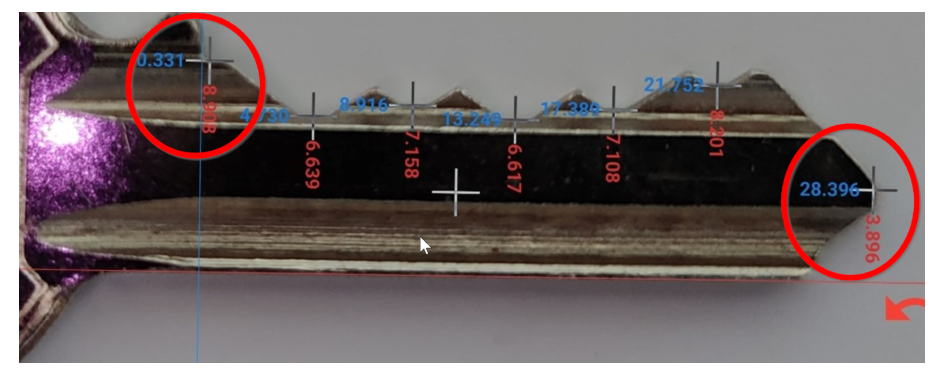
Figure 6: Shoulder and key length focus
The values should be reported on the file configuration files like explained on the documentation : gianninou/autokey3d: A software to create 3D models for key blanks, bumpkeys and regular keys.
Generating the 3D key file
As the profile was created and the configuration file updated to our key, the next is to generate the key by giving all the pin length to the application.
The key should look like the original one; However, for a better printing and trying to avoid breaking the lock, the developer of the application adds a parameter named lasercut.
That parameter avoids printing all the keys like the original one with all the "spikers" that the key possesses. The tooths just need to be present on the coordinate found, all the space between this position is not important. So, to help the print process and avoiding breaking some piece of plastic inside the key, the lasercut smooth the angle between each position.
The following image shows that point.
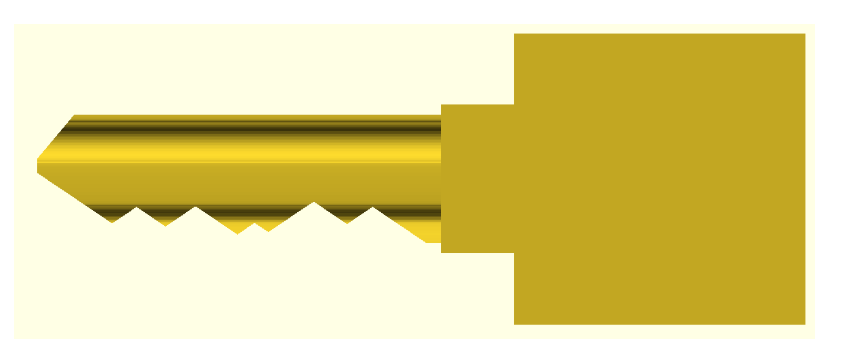
Figure 7: Standard cut
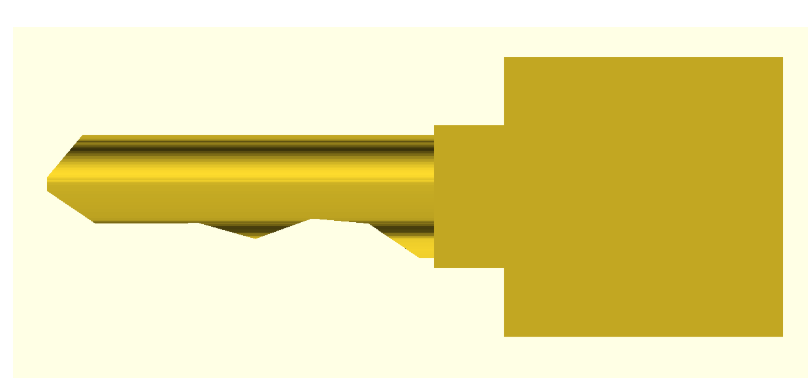
Figure 8: Laser cut
These two keys possess the same tooth position, the only difference is that it's more difficult to count the pins and to find them on that kind of key. Manufacturer does not that kind of cut as the key is less stable on the cylinder with that kind of cut as there is not notch feedback while inserting the key.
Let's go printing
Next, thanks to your 3D printer or colleague one, you can print that key. It should be noticed that some key could require some support while printing. We won't enter into details as this is not supposed to be focus on 3D printing methods and rules and it could depend on the type of printer used (FDM, DLP, ...)
For my part, I used an FRM printed, so with a plastic filament, which is melted and added layer by layer. Look at the video for the print process and the test to open a cylinder.
Figure 9: Printing
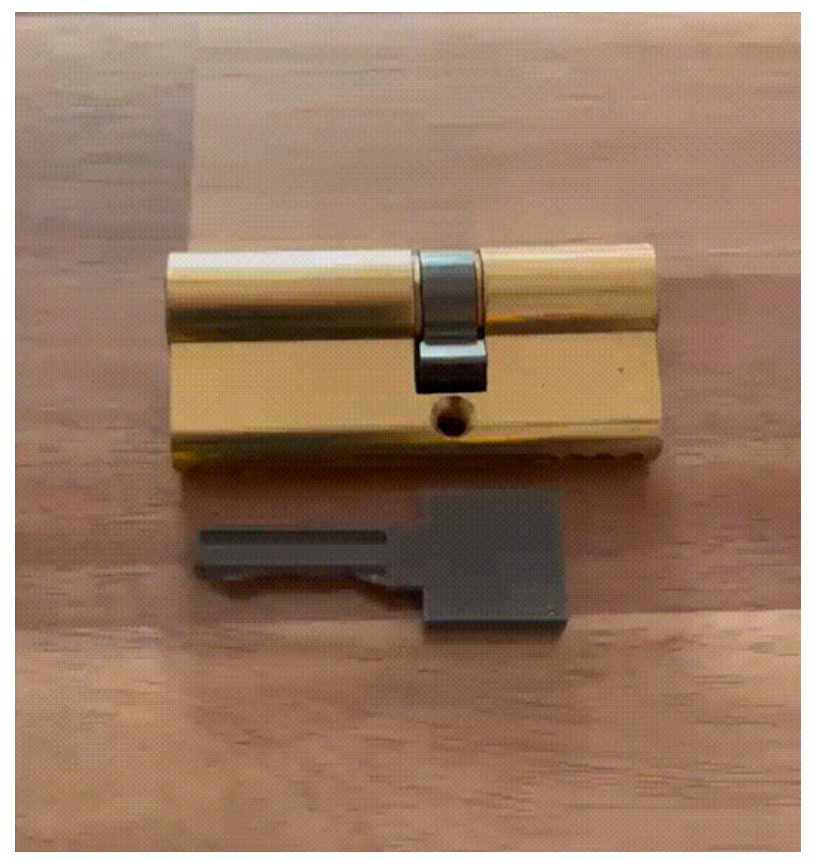
Figure 10: Key working
Conclusion
Now it's explicit why a key should be treated like a password. From a company's point of view, important keys should be secure inside a safe to avoid that kind of copy. For employees using a key like passe-partout, it is also important to keep it on your pocket. Do not let them anywhere on your desk.
It should be noticed that this process is only usable for keys with teeth which are less common due to the presence of radial key (the one with little holes on it). But some other cloning system exists like copy with clay for example.
Reference: gianninou/autokey3d: A software to create 3D models for key blanks, bumpkeys and regular keys